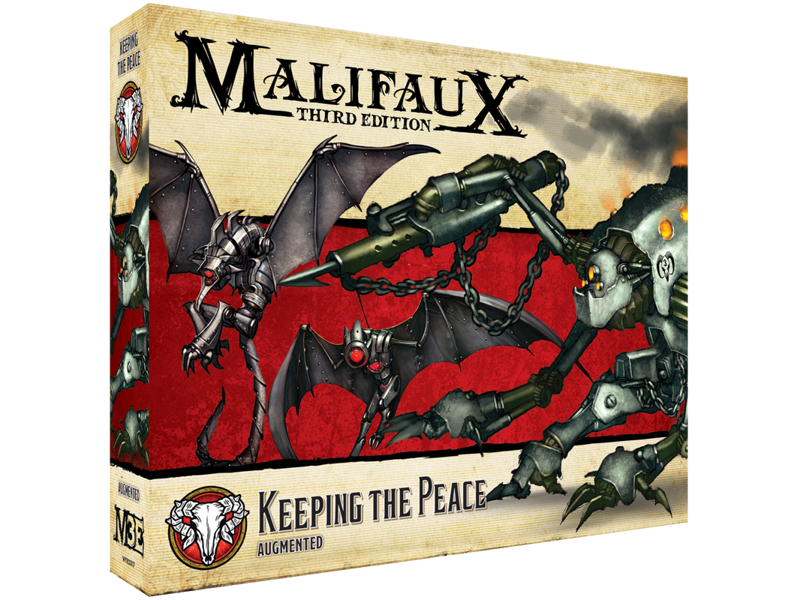
Malifaux 3E Keeping the Peace
review by Alapai
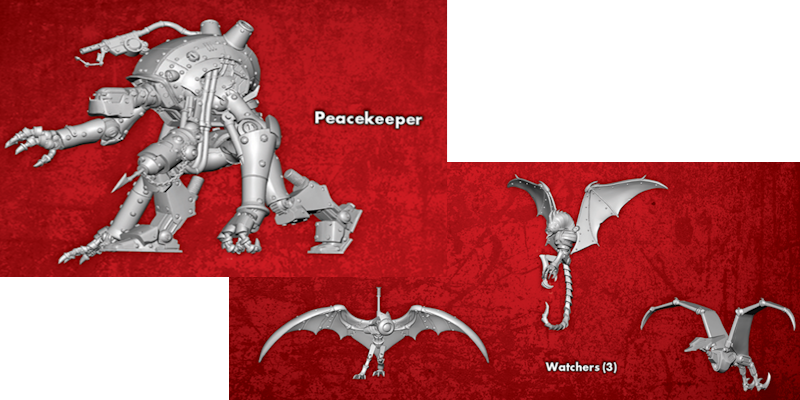
The Keeping the Peace box for Malifaux 3E made by Wyrd Games features four models for the Guild faction with the Augmented keyword: a Peacekeeper and three Watchers. Charles Hoffman, the director of the Guild’s Amalgamation Charter Enforcement Office, utilizes constructs to fight for him on the battlefield. Like with my other reviews this year, this is more about the models than the gameplay as I do not play miniatures games.
The first thing you need to know about Wyrd’s minis is that they can be very fidgety. It’s why they have a t-shirt for sale on their website that says “Masochistic Malifaux Modelers - I survived Yan Lo’s Beard!” Yan Lo’s beard is an infamous component for the character Yan Lo from Second Edition that is separate from the head and is many people’s go-to for unreasonable assembly. My personal favorite though is Abuela who wears a large sombrero with skulls hanging off the sides. These skulls are individual pieces to attach to the hat that are ridiculous to me.
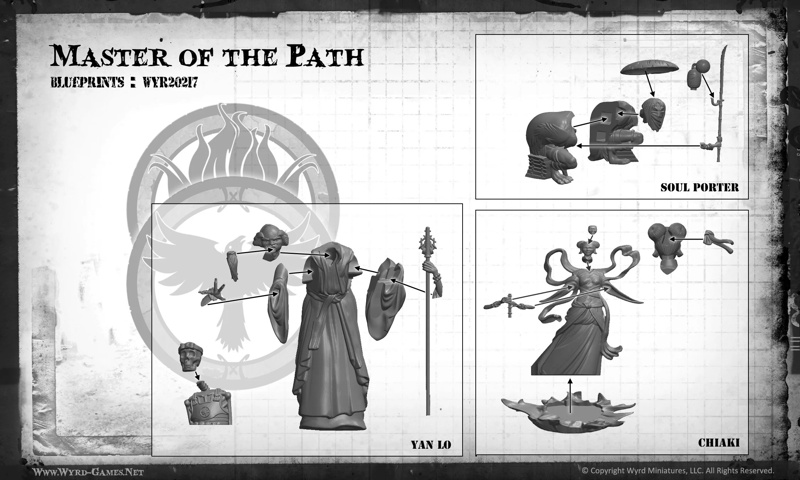
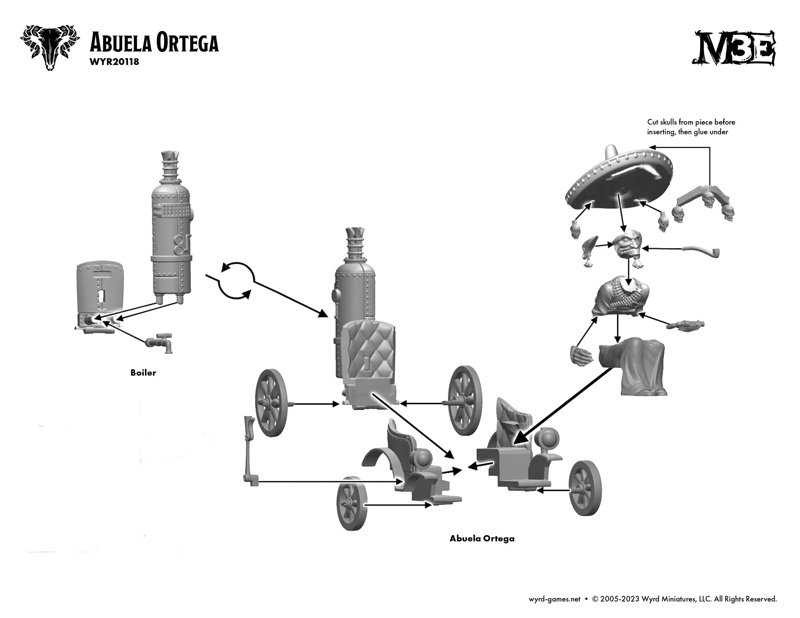
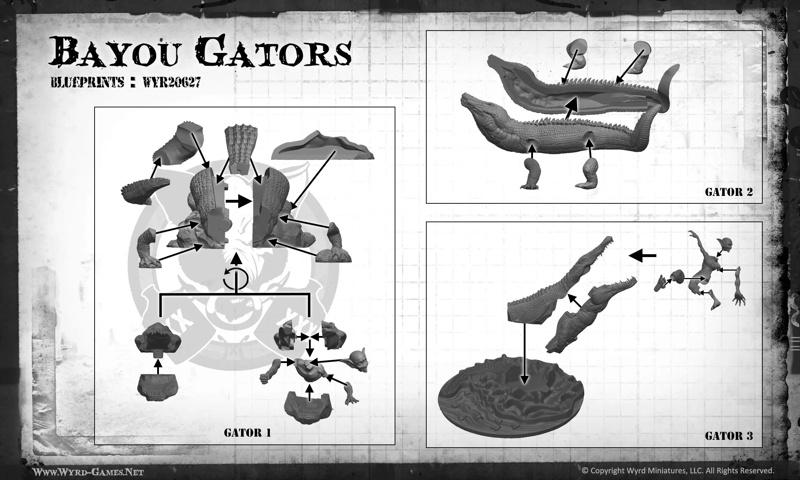
If you look at the images showing the assembly for Yan Lo and Abuela, you’ll notice that the instructions are less of a step-by-step guide for building the model, like Games Workshop or Atomic Mass Games have, but just an exploded image of the model with all of the components and arrows pointing to where they all fit together. In addition to having absurdly tiny components to attach together, none of these are labeled, meaning that if two components look similar, it’s up to you to figure out which one is which and goes where. And while you can mostly build the models in parts which you can attach to each other later (like building Abuela’s boiler, chair and person each separately before putting them together), some of these parts are silly, like the Bayou Gator 1 which has 8 parts consisting of a right side, left side, front right leg, left right leg, top, back and two tail sections that are all just one big mess.
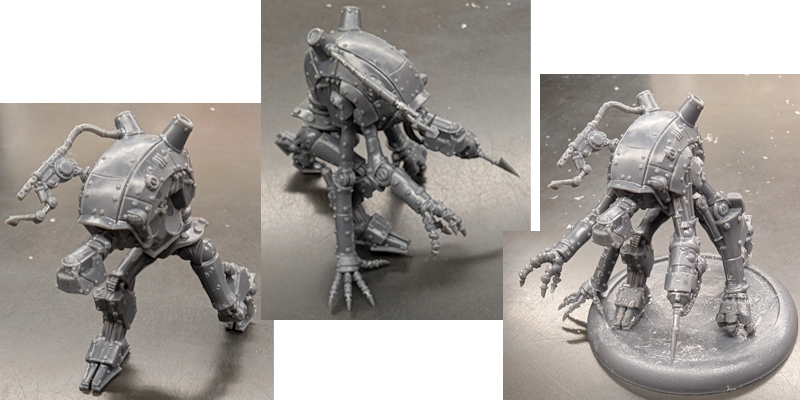
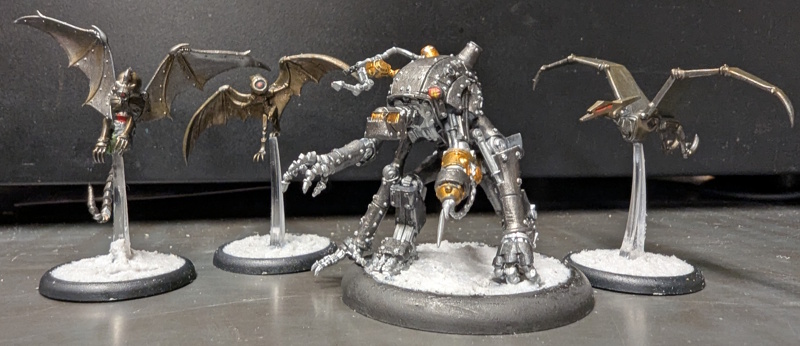
With the Keeping the Peace box, the four models are three Watchers, which are mostly fine and one Peacekeeper which is much more annoying.
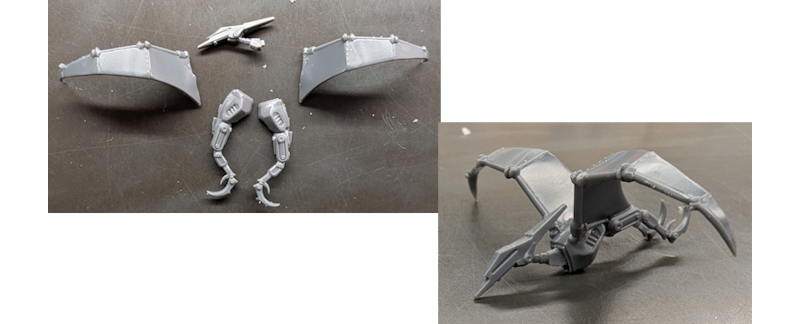
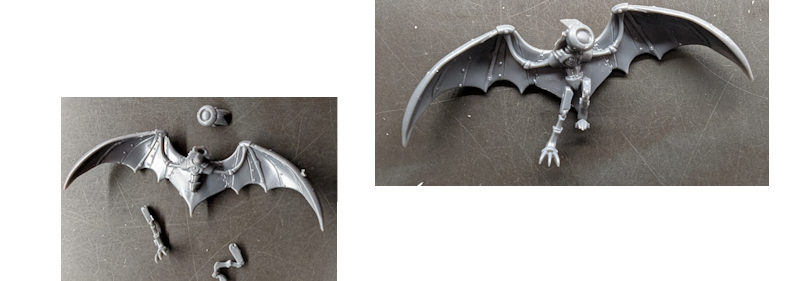
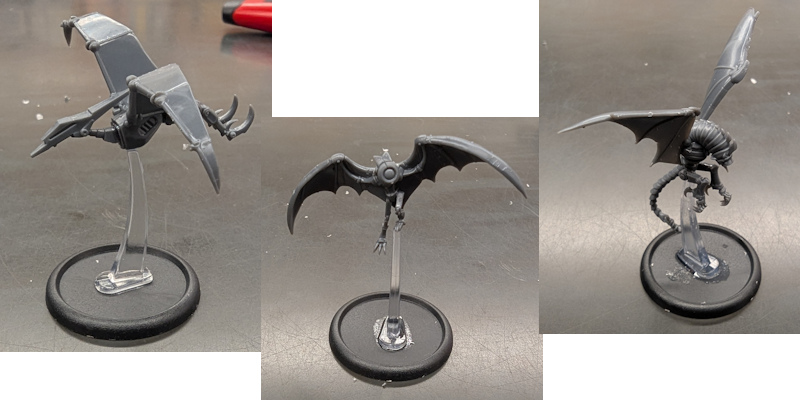
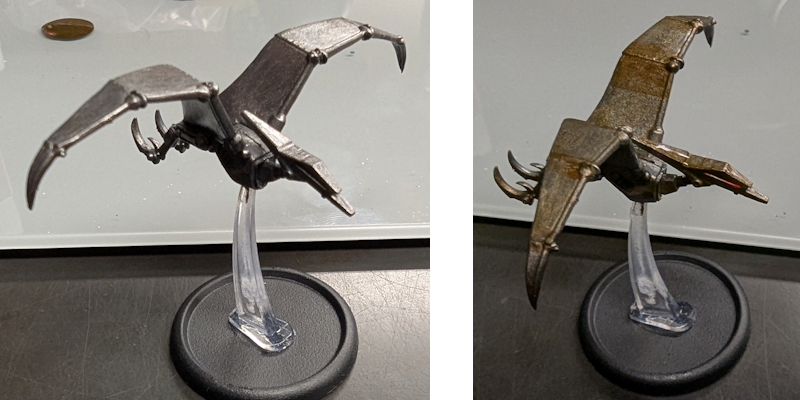
In putting the Watchers together, the only real fiddly bits were the legs of the Watcher with a tail. The other two were very straight forward to build. The pteranodon-like Watcher consisting of a head, the body split down the middle (with the legs as part of that body) and the two wings. The wings were the only tricky part as getting the angle they attach at wasn’t super secure.
The Watcher with the large eye was pretty simple, consisting of a body, the eye and two legs. Where the legs went wasn’t super well defined, so I just kind of attached them and it looked fine, so I moved on.
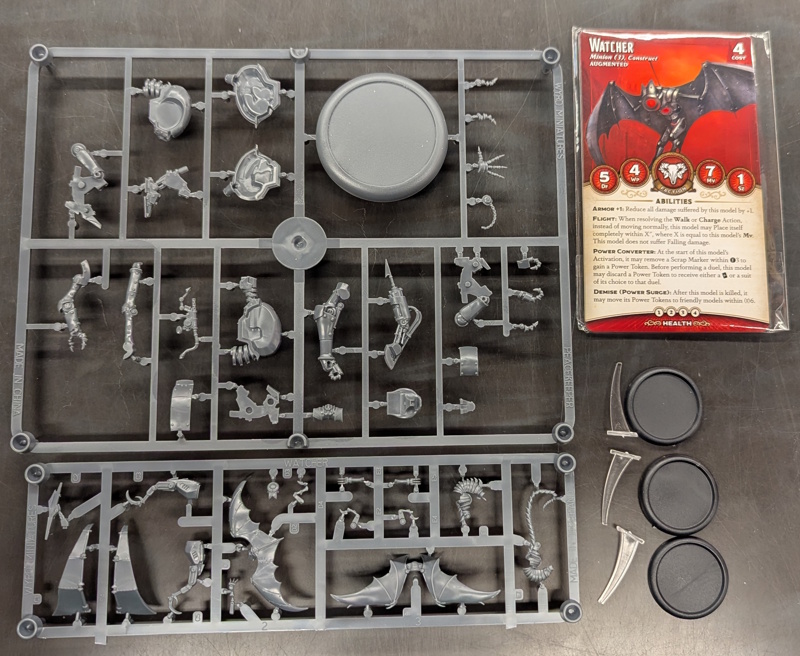
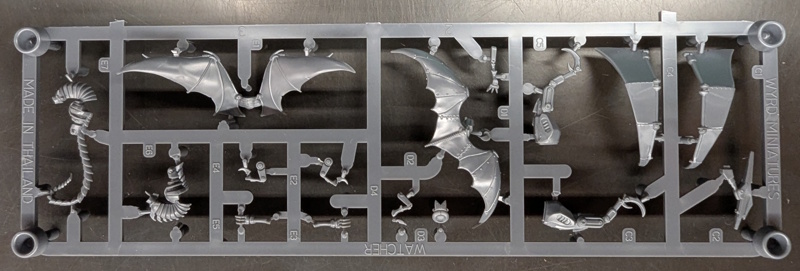
The Watcher with a tail was the trickiest of the Watchers, but not too bad. It consisted of a body, tail, wings and then each leg was two parts. The legs each consisted of a main part that attaches to the body and has the back claw and then the front claws which attach on top. Each looks the same at a glance and the only saving grace I had was to use the numbers on the sprue. Yes, the Malifaux sprue for the Watchers actually had numbers! Heck, numbers and letters, making it obvious which components went to which Watcher. And that’d be great if there were also instructions for putting them together. As far as I can tell, there aren’t instructions online for putting together the Watchers from this box set. There are instructions for an old Watcher, but not these. Ultimately, there are pretty easy to put together, so I was able to look at the back of the box, look at the cards that came with the box and use the letters and numbers to assemble the Watchers, but it was annoying to not know if what I was doing was correct.
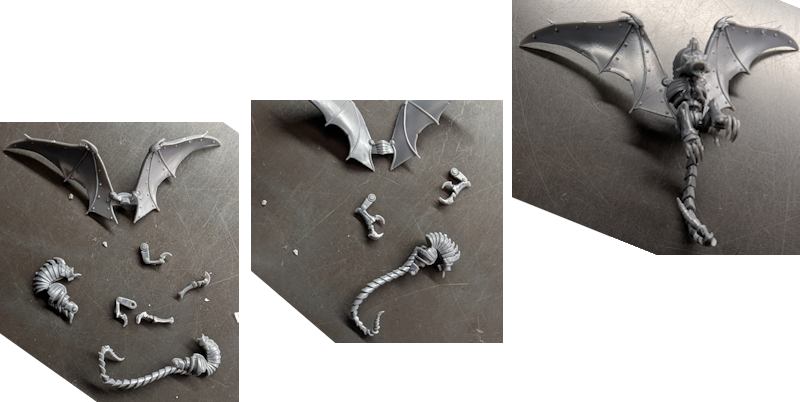
Also, you may notice from the back of the box and the assembly that the Watchers look like they are flying in the air, which is what the models are doing as well. Like with the drones from Shadowsun or ED-E, the Watchers have flight stands. Unlike the drones from Shadowsun or ED-E, there is no obvious place to attach the flight stands. On ED-E or the T’au drones I’ve assembled, there is a peg on the flight stand that slots into the bottom of the model. With the Watchers, there is no slot to attach the flight stand to and as you can also see from the back of the box, the flight stand isn’t shown attached to the model, so I had to improvise. The pteranodon was easy enough to attach a stand to. The large eyed Watcher was pretty easy, although the legs being a bit shaky made the attachment to the stand a little finnicky. The Watcher with the tail was the most annoying as I had to try and figure out where to attach the stand. I first tried on the tail itself, but it wasn’t secure enough, so I attached the stand to the bottom of the torso, with the tail running alongside the stand.
The Peacekeeper was much more complex a model to assemble. While it did have assembly instructions, they were only the exploded image that Wyrd generally has. Additionally, it had the most fiddly bits of the Keeping the Peace box with the claws it had on two of its arms. I decided to put it together part by part, which the instructions do have separately.
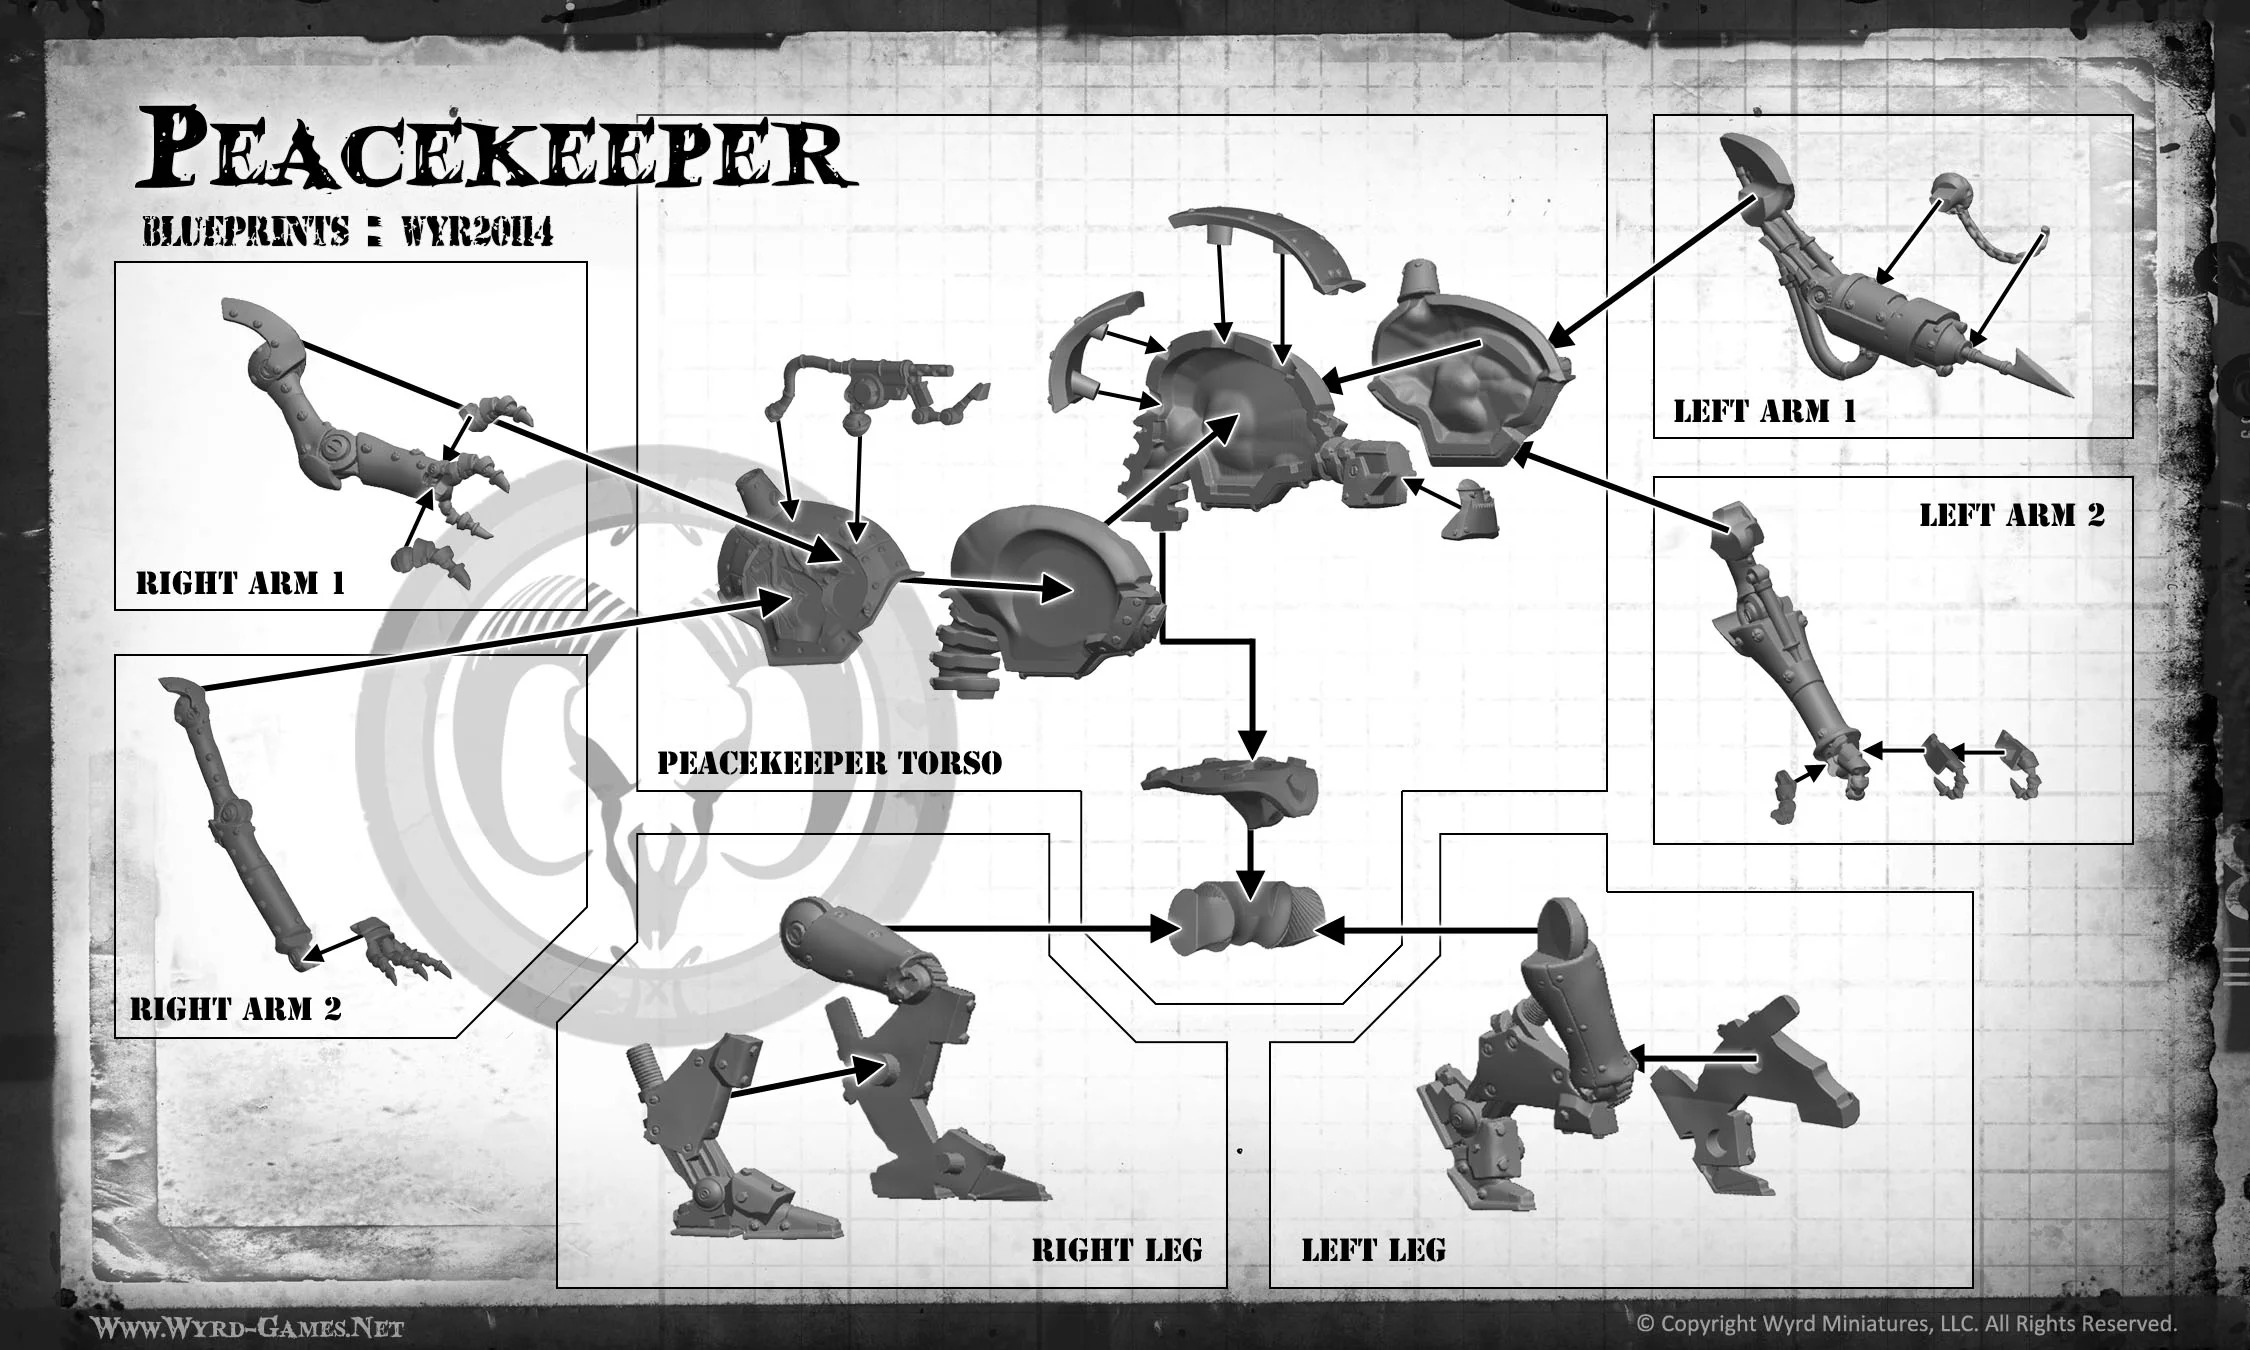
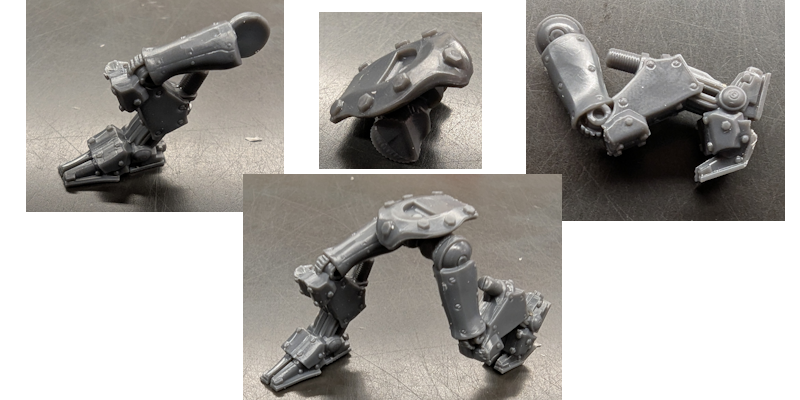
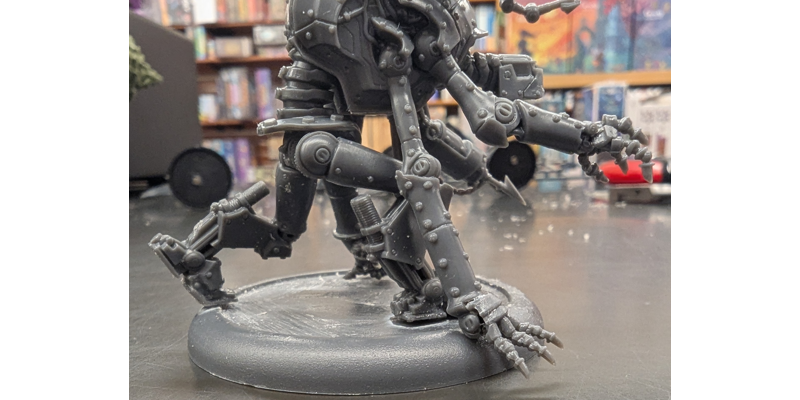
For the legs, I actually took the crotch from the torso, assembled that, then assembled the legs and attached those to the crotch. Each of those were very easy to assemble as they consisted of two easy to distinguish parts that fit together in an obvious way.
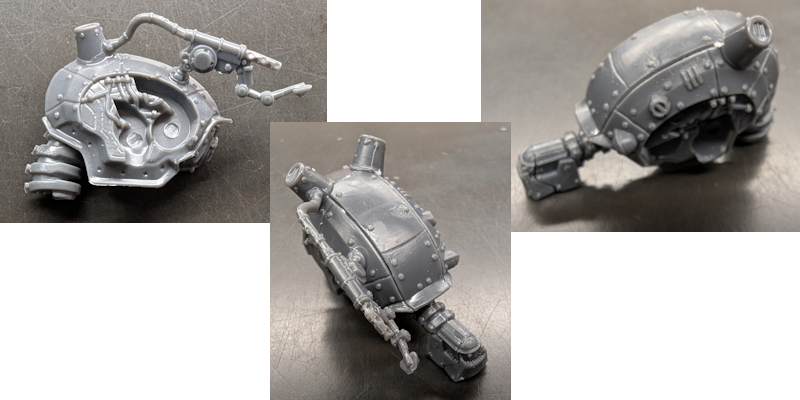
The torso wasn’t too hard to assemble, with the head being the only part that seemed unnecessary. The torso was made of a right and left half, each of which was made of two parts. There’s also the head that attaches to the front that, as it doesn’t take up much space and doesn’t add much to the width of the sprue, probably could have just been one piece instead of two. In addition to the two halves, there is a flamethrower that slots in easily and two plates that cover the gap between the two halves when attached to each other.
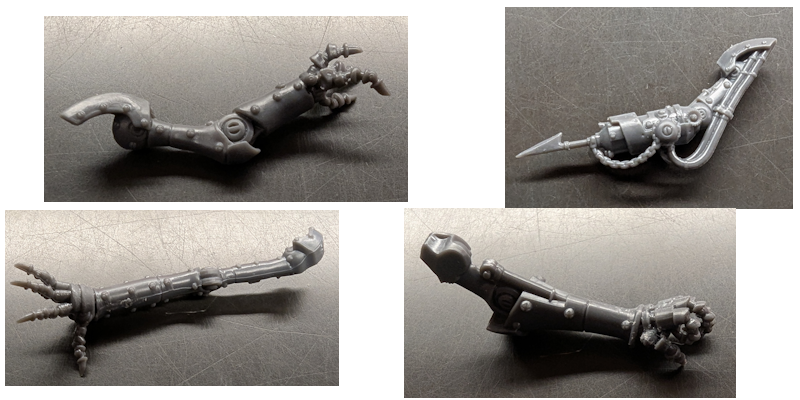
The arms were the most annoying of all the components in the box. Okay, the “Left Arm 1” was easy to assemble as it was just a harpoon gun with one chain that slots into it in an obvious way. Similarly, “Right Arm 2” was easy as it was just two pieces, an arm and hand that easily slot together. But with “Left Arm 2” and “Right Arm 1,” there was more annoyance as each featured individual claws to attach to the arms. “Left Arm 2” had three claws to attach, but at the very least, two easily slotted together and into an obvious place on the arm and were easy to distinguish by being curled up. The third individual claw was much trickier, as the claw next to the other “Left Arm 2” claws on the sprue looked similar to the claws on a separate part of the sprue and none of them slotted in particularly well to the slot on “Left Arm 2” or “Right Arm 1.” Ultimately, I was able to fit all of the claws onto the arms, but it required more precision than I wanted to have to use and more brainpower than I think should be necessary for assembling a model.
You’d think that’d be the end of the annoyances, right? Unfortunately, that was not the case as not only did the model not fit fully onto the base, requiring me to have its hind leg up on the lip of the base, but the simple non-harpoon arm also reached down past the legs. This means the arm actually reaches past the top of the base. You can somewhat see this if you look at the back of the box, as the arm does show as being past the foot.
Painting these was ultimately the easiest aspect. While there was a good amount of detail, I didn’t feel obligated to put a lot of effort into the painting, as they were mechanical creatures that I could just paint metallic. While there was more nuance that I gave to painting the Peacekeeper, the Watchers I just painted with some Citadel Iron Warriors to make them a dark, gray metal, then did a light coat of Vallejo Special FX Rust to make them look more worn out.
The Peacekeeper I wanted to make a mix of metals as though he was put together in a more patchwork manner. I started by painting the majority of him with Citadel Iron Warriors, especially more bulky outer layers. I followed that up with painting some of the pieces golden with Citadel Retributor Armour, silvery with the AK Interactive Silver Paintmarker and used a mix of Monument Hobbies Coal Black with both Vallejo’s and Monument’s Metallic Mediums to make a black metal for a couple areas.
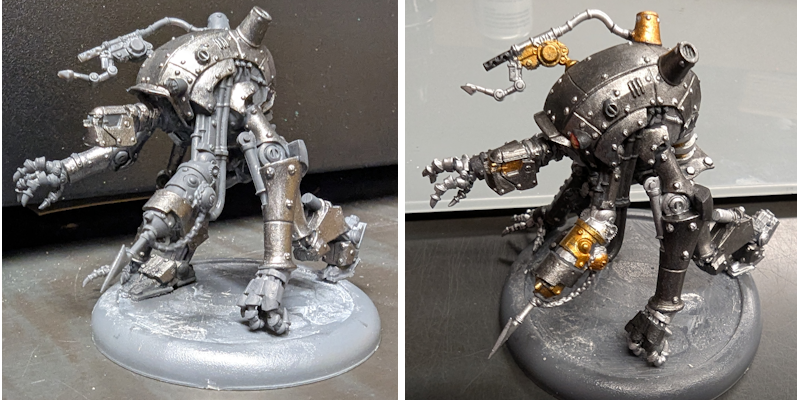
I finally added some of Vallejo’s Grey Pumice to the bases to give them some texture.
If you’re tired of Atomic Mass Games’ simple minis or Games Workshop’s minis with some complexity, but relatively easy instructions, Wyrd’s Malifaux minis can provide you a challenge, both for its tiny pieces to try to fit together as well as not making it easy to tell what you’re supposed to do. I also completed these before Malifaux released its 4th Edition, which has instructions that are still exploded images, but at least now have front and back for some of their models. Regardless of edition, you do get very nice models in the end though that are decently complex, but pretty easy to paint.
Malifaux 3E & the new 4E Minis are available now from our webstore.